Workspace Management
A Workspace helps marketers and agencies manage multiple clients easily. You can keep each client in a separate workspace to make tracking, follow-ups, and management simple and organized.
This is one of the specialized agency features that helps agencies handle multiple clients smoothly, without any mix-ups or confusion.
Each workspace requires its own separate subscription plan. Billing, subscription, and usage are managed individually for every workspace. This helps keep client data, expenses, and performance completely separate and easy to manage.
Creating a Workspace
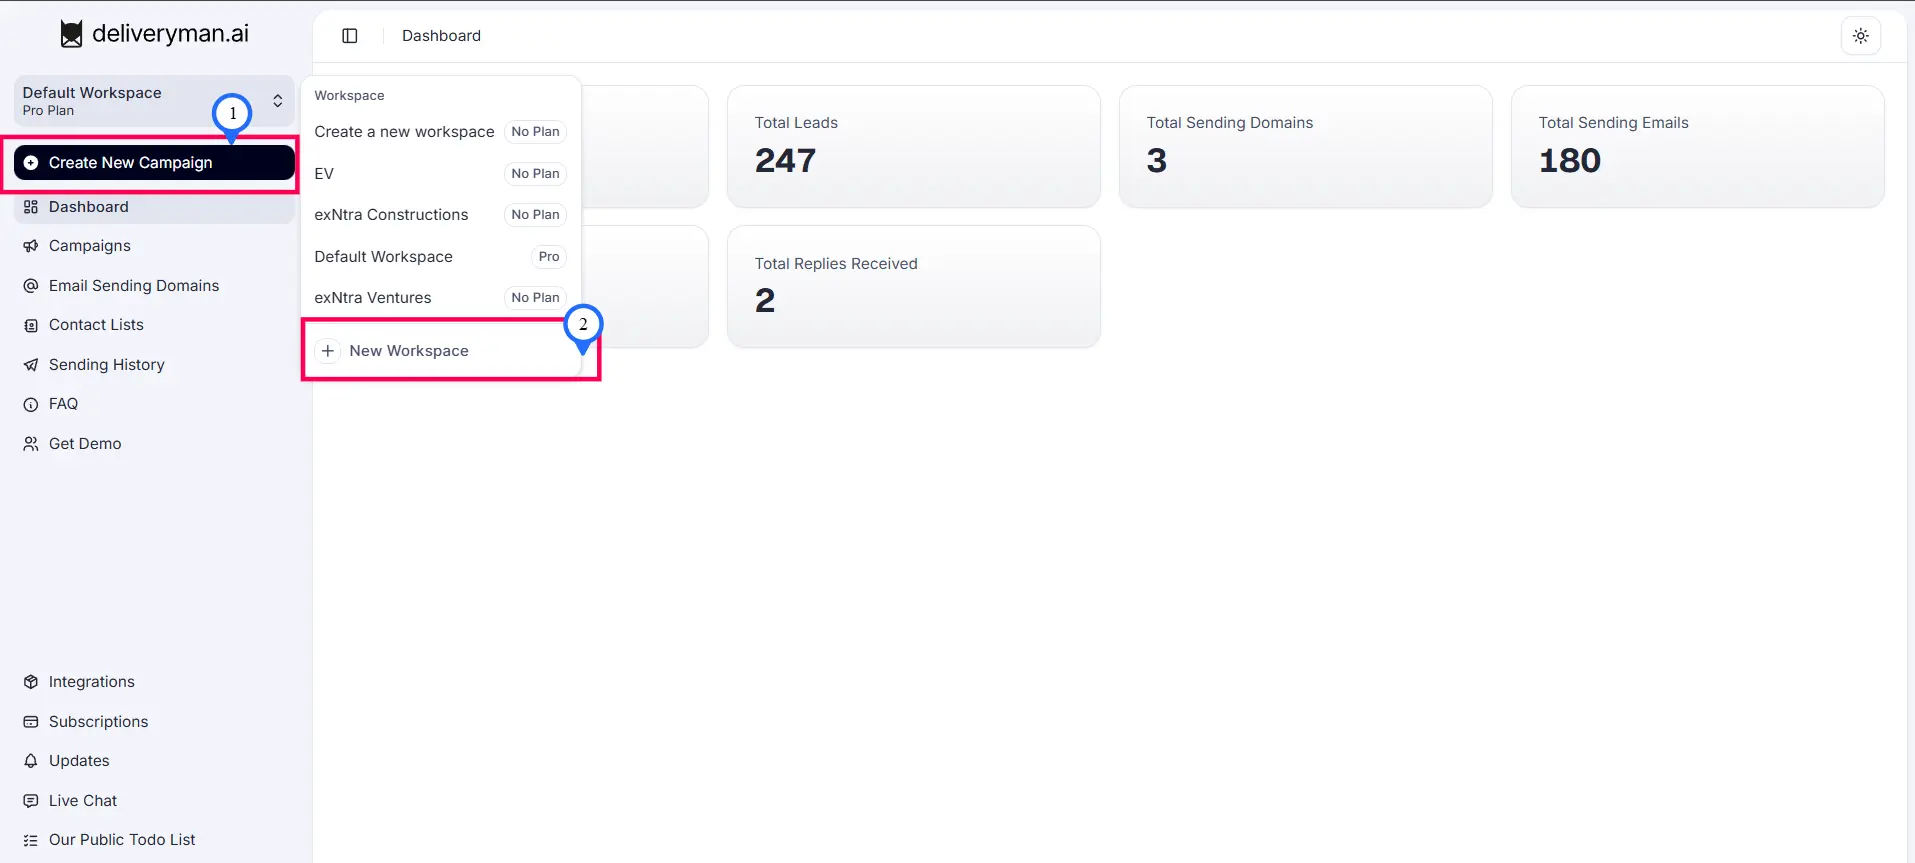
- Open the Workspace Menu and Select "New Workspace"
Go to the top-left corner of your dashboard and click your current workspace name (for example, Default Workspace). A dropdown menu will appear. From the dropdown, scroll down and click New Workspace to create a new one.
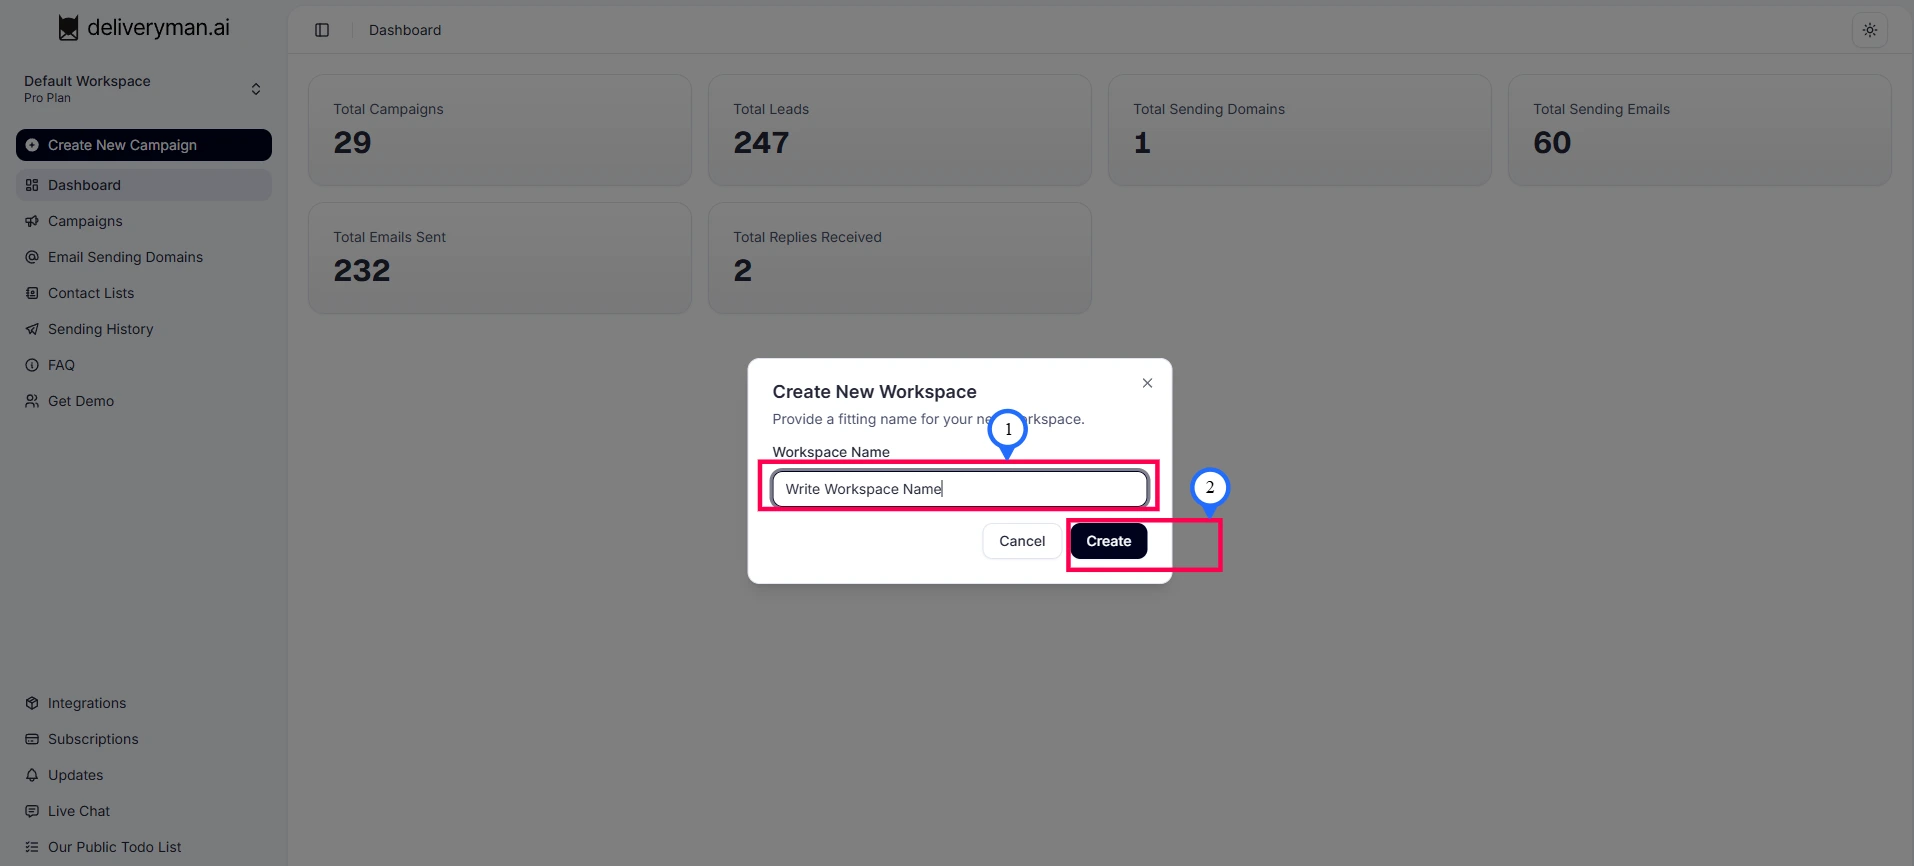
- Enter Workspace Name and Click Create
A modal titled Create New Workspace will appear. Enter the name you want for your workspace in the Workspace Name field. After typing the name, click Create. Your new workspace will be added and ready to use.
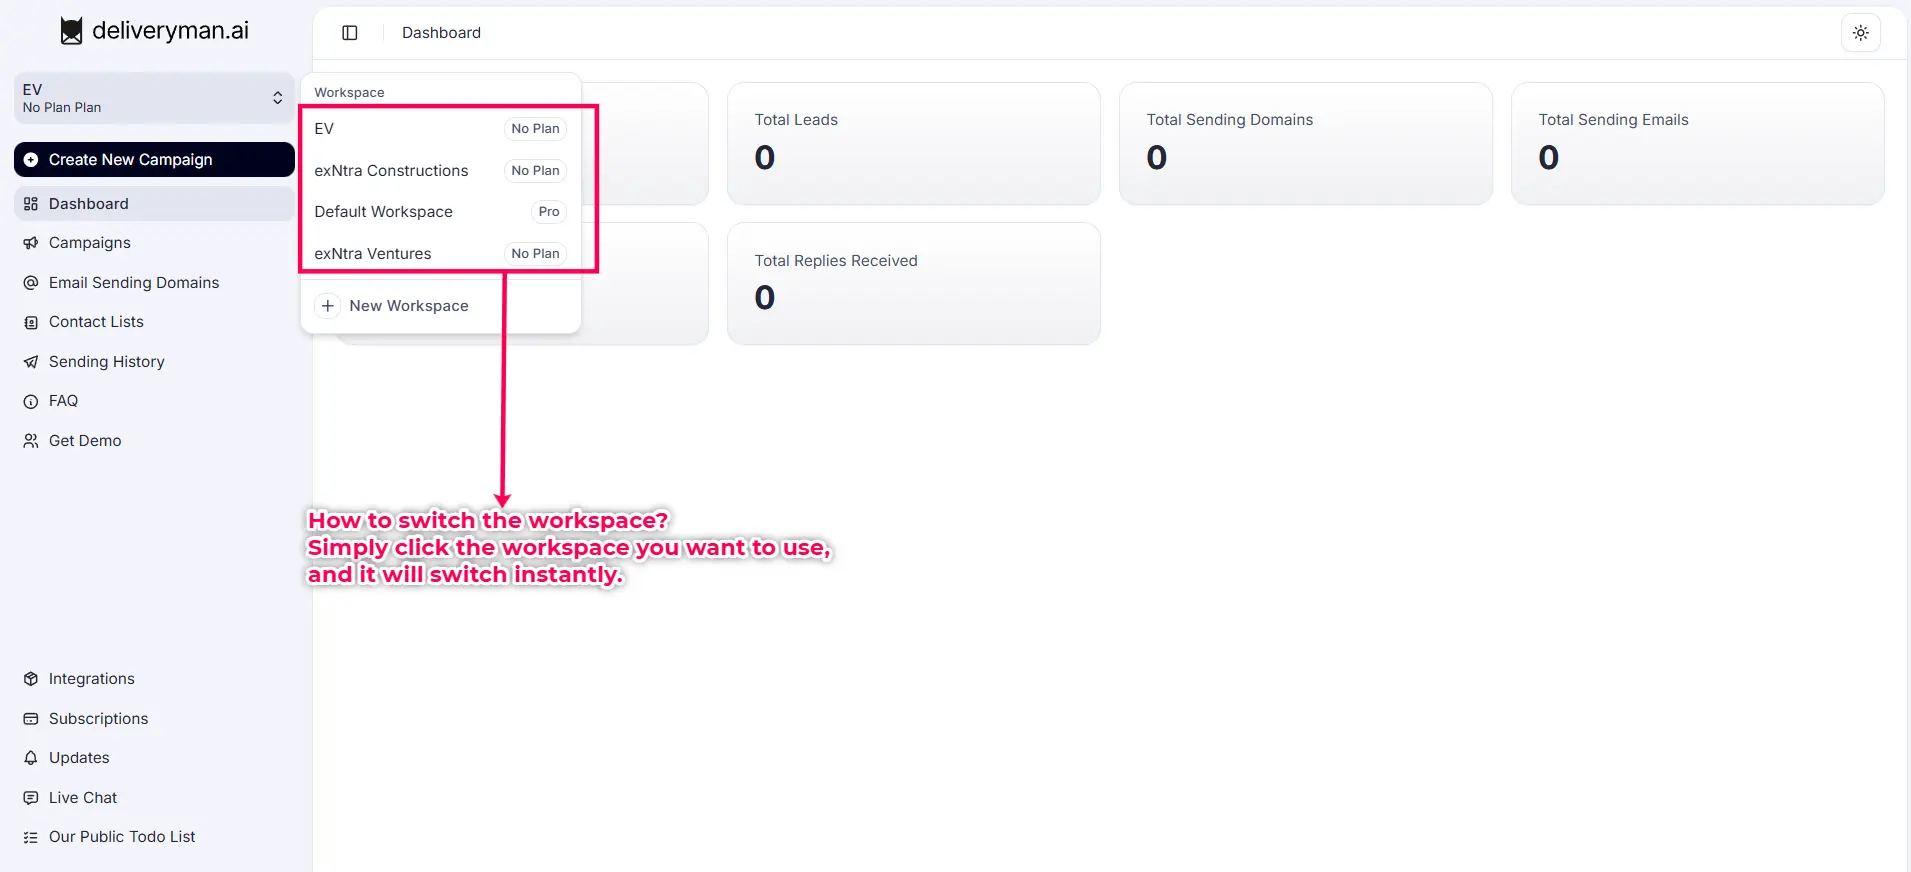
Switching Between Workspaces
- Use the workspace switcher in the top-left corner of the dashboard.
- Switching workspaces does not affect your login session.
- Each workspace has its own data, plan, contact lists, and campaign history.
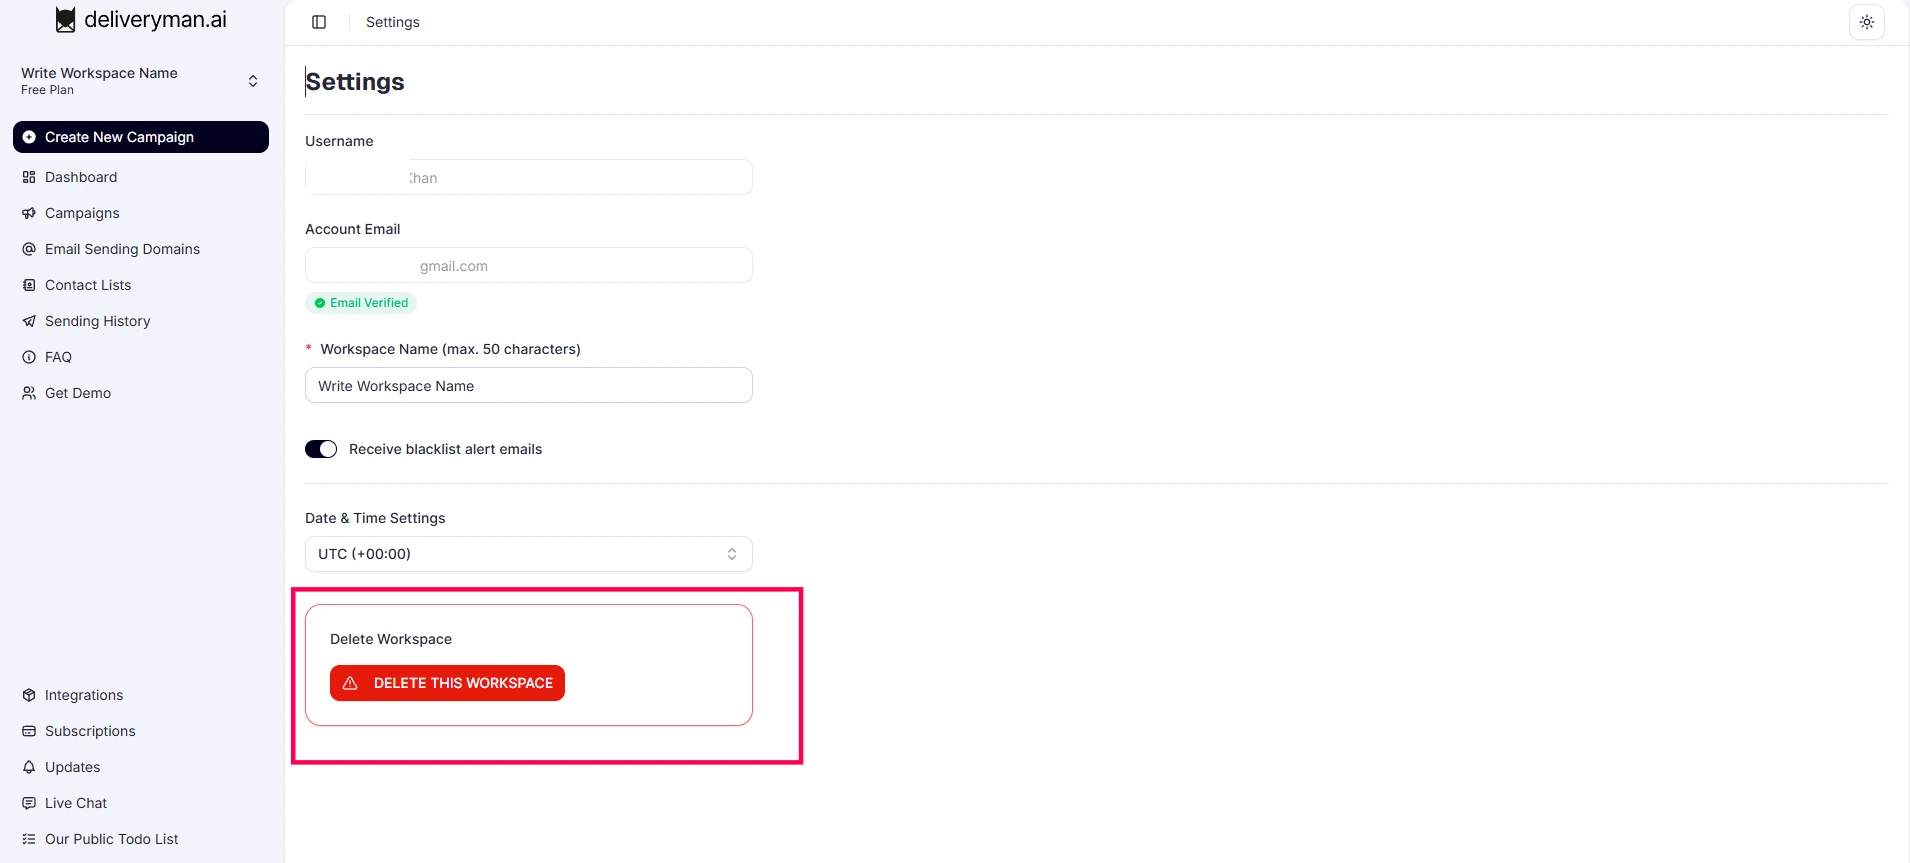
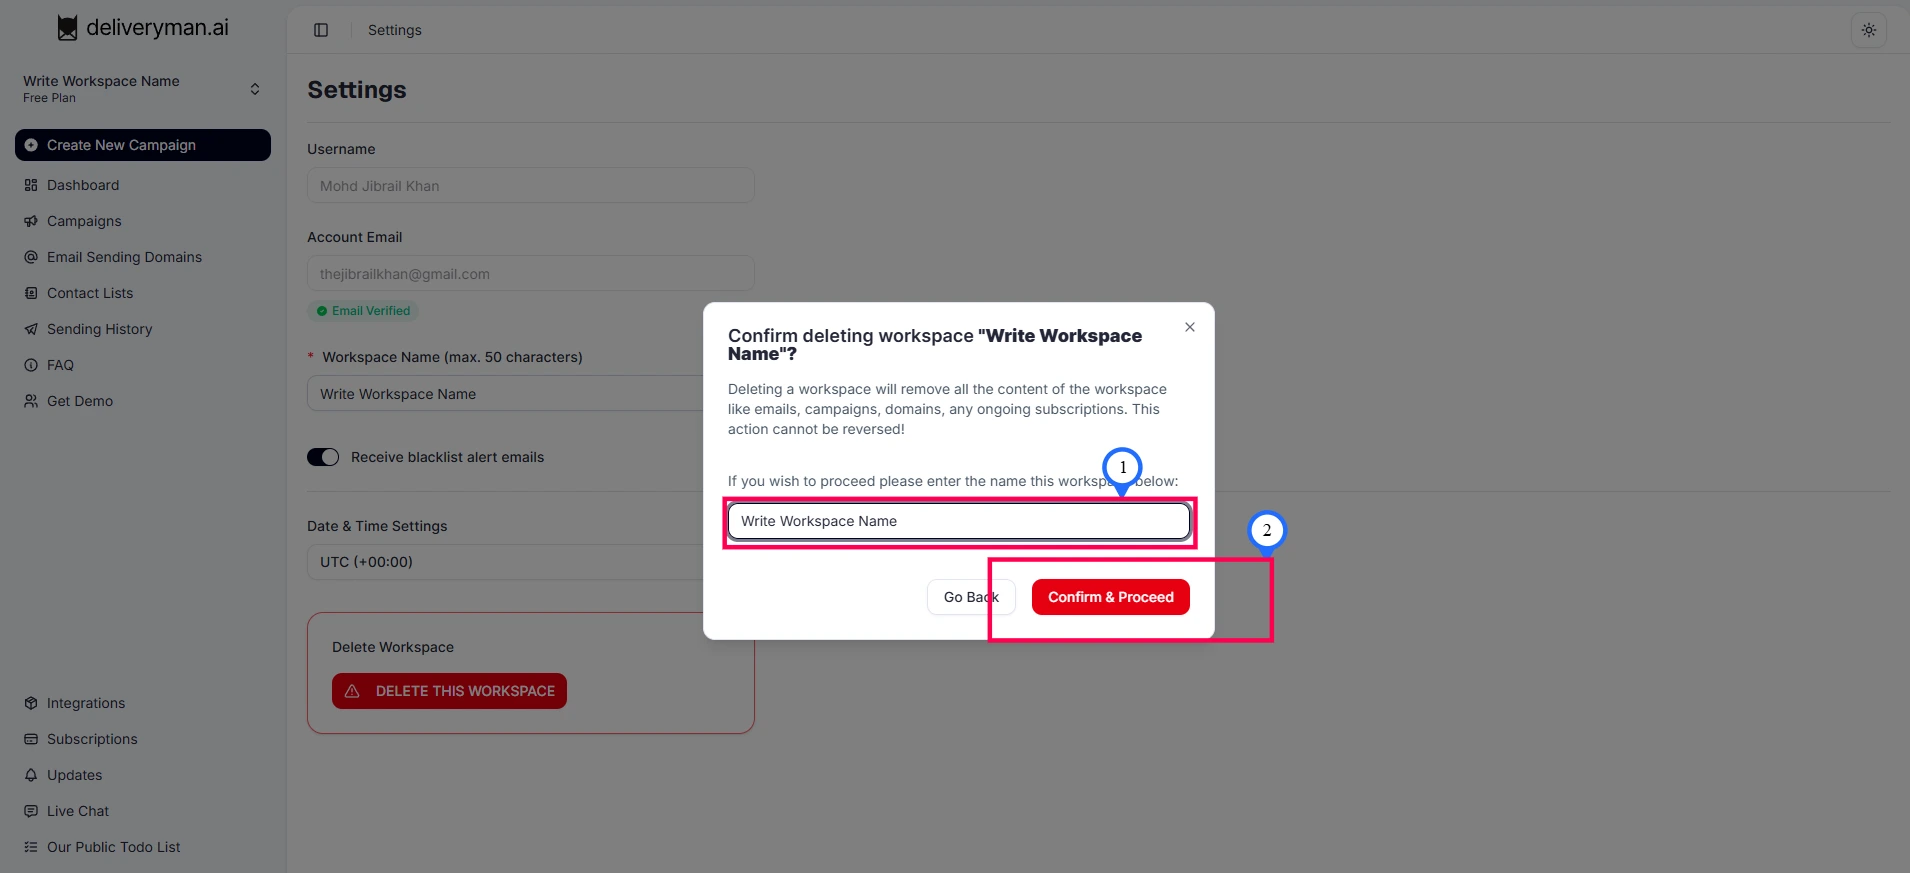
Deleting a Workspace
- Go to: Click your name at the bottom-left → Settings → Workspace Settings → Delete Workspace
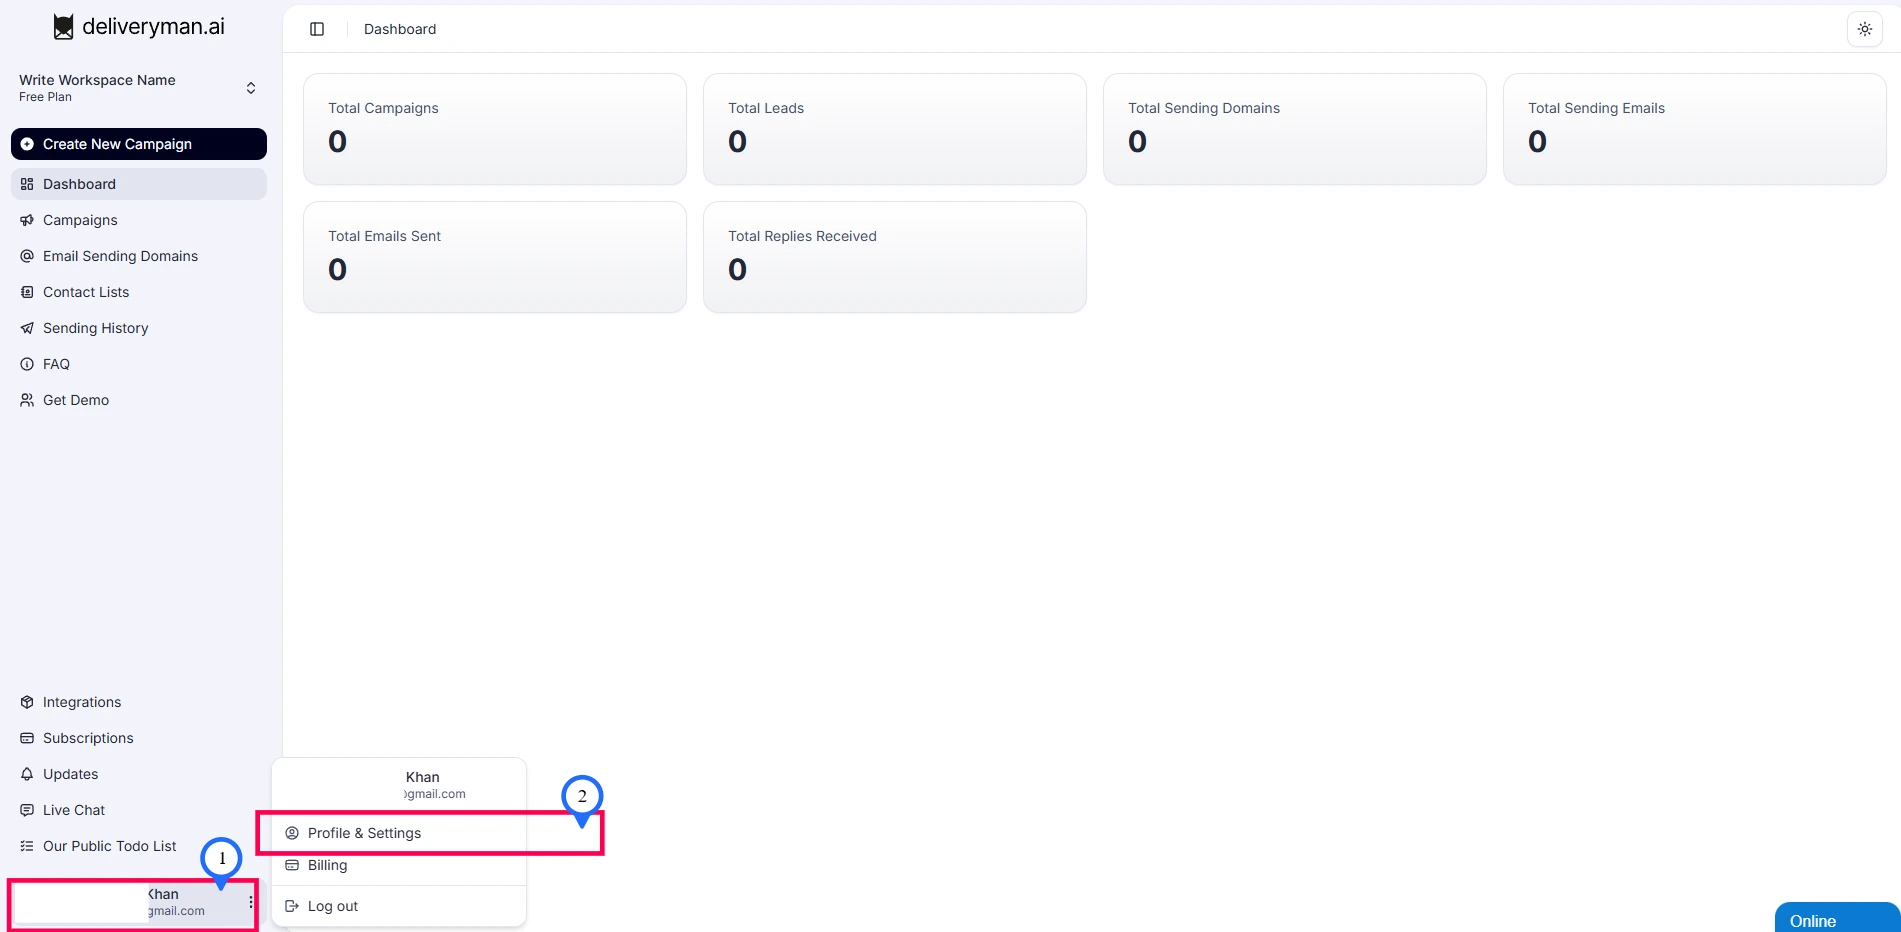
- Once you delete a workspace, everything within that workspace will be permanently deleted, including all contacts, campaigns, and other data. And this is irrevocable. You cannot undo this action. So make sure that you know what you are doing here.
Best Practices
- Use different workspaces for each brand, client, or campaign strategy.
- Keep contact lists and sending domains organized under the right workspace.
- Monitor credit usage and bounce rates in each workspace to maintain deliverability.